
Docker and Kuberntes
As a mac user I lost few hours at the beginning of this semester as our Capstone project is based on a dotNet framework. I had to spend more time setting up a virtual machine so I can run MSSQL as it is not available in platforms other than Windows. That is just the beginning, other software engineers around the globe might need to test their applications on different environment to see if they work and behave as they should. Imagine setting up a virtual machine every time you had to develop an application, not only a virtual machine takes time to be completely setup, it takes us as twice as we used to because we still need to do all the setup we usually do on our host machine.
That is where containers comes into place, especially docker. Application containerization is nothing new as it is a technology that has been evolving since the 70s. In the other hand, Docker has been around since 2013 and since then it did revolutionize how we work with containers. As much as system administrators need a software like VMware ESXI to manage the hundreds of virtual machines their users use we also need something to do the exact thing but with our containers. That is where container-orchestration system like Kuberntes comes into place. In this blog post we will go through the basics of Docker and Kuberntes in order to have a proper understanding of how these systems work, then in the second blog post we will demonstrate how both environments work hands in hands to achieve a scalable, stable and robust environment.
🐳 What is docker ? 🐳
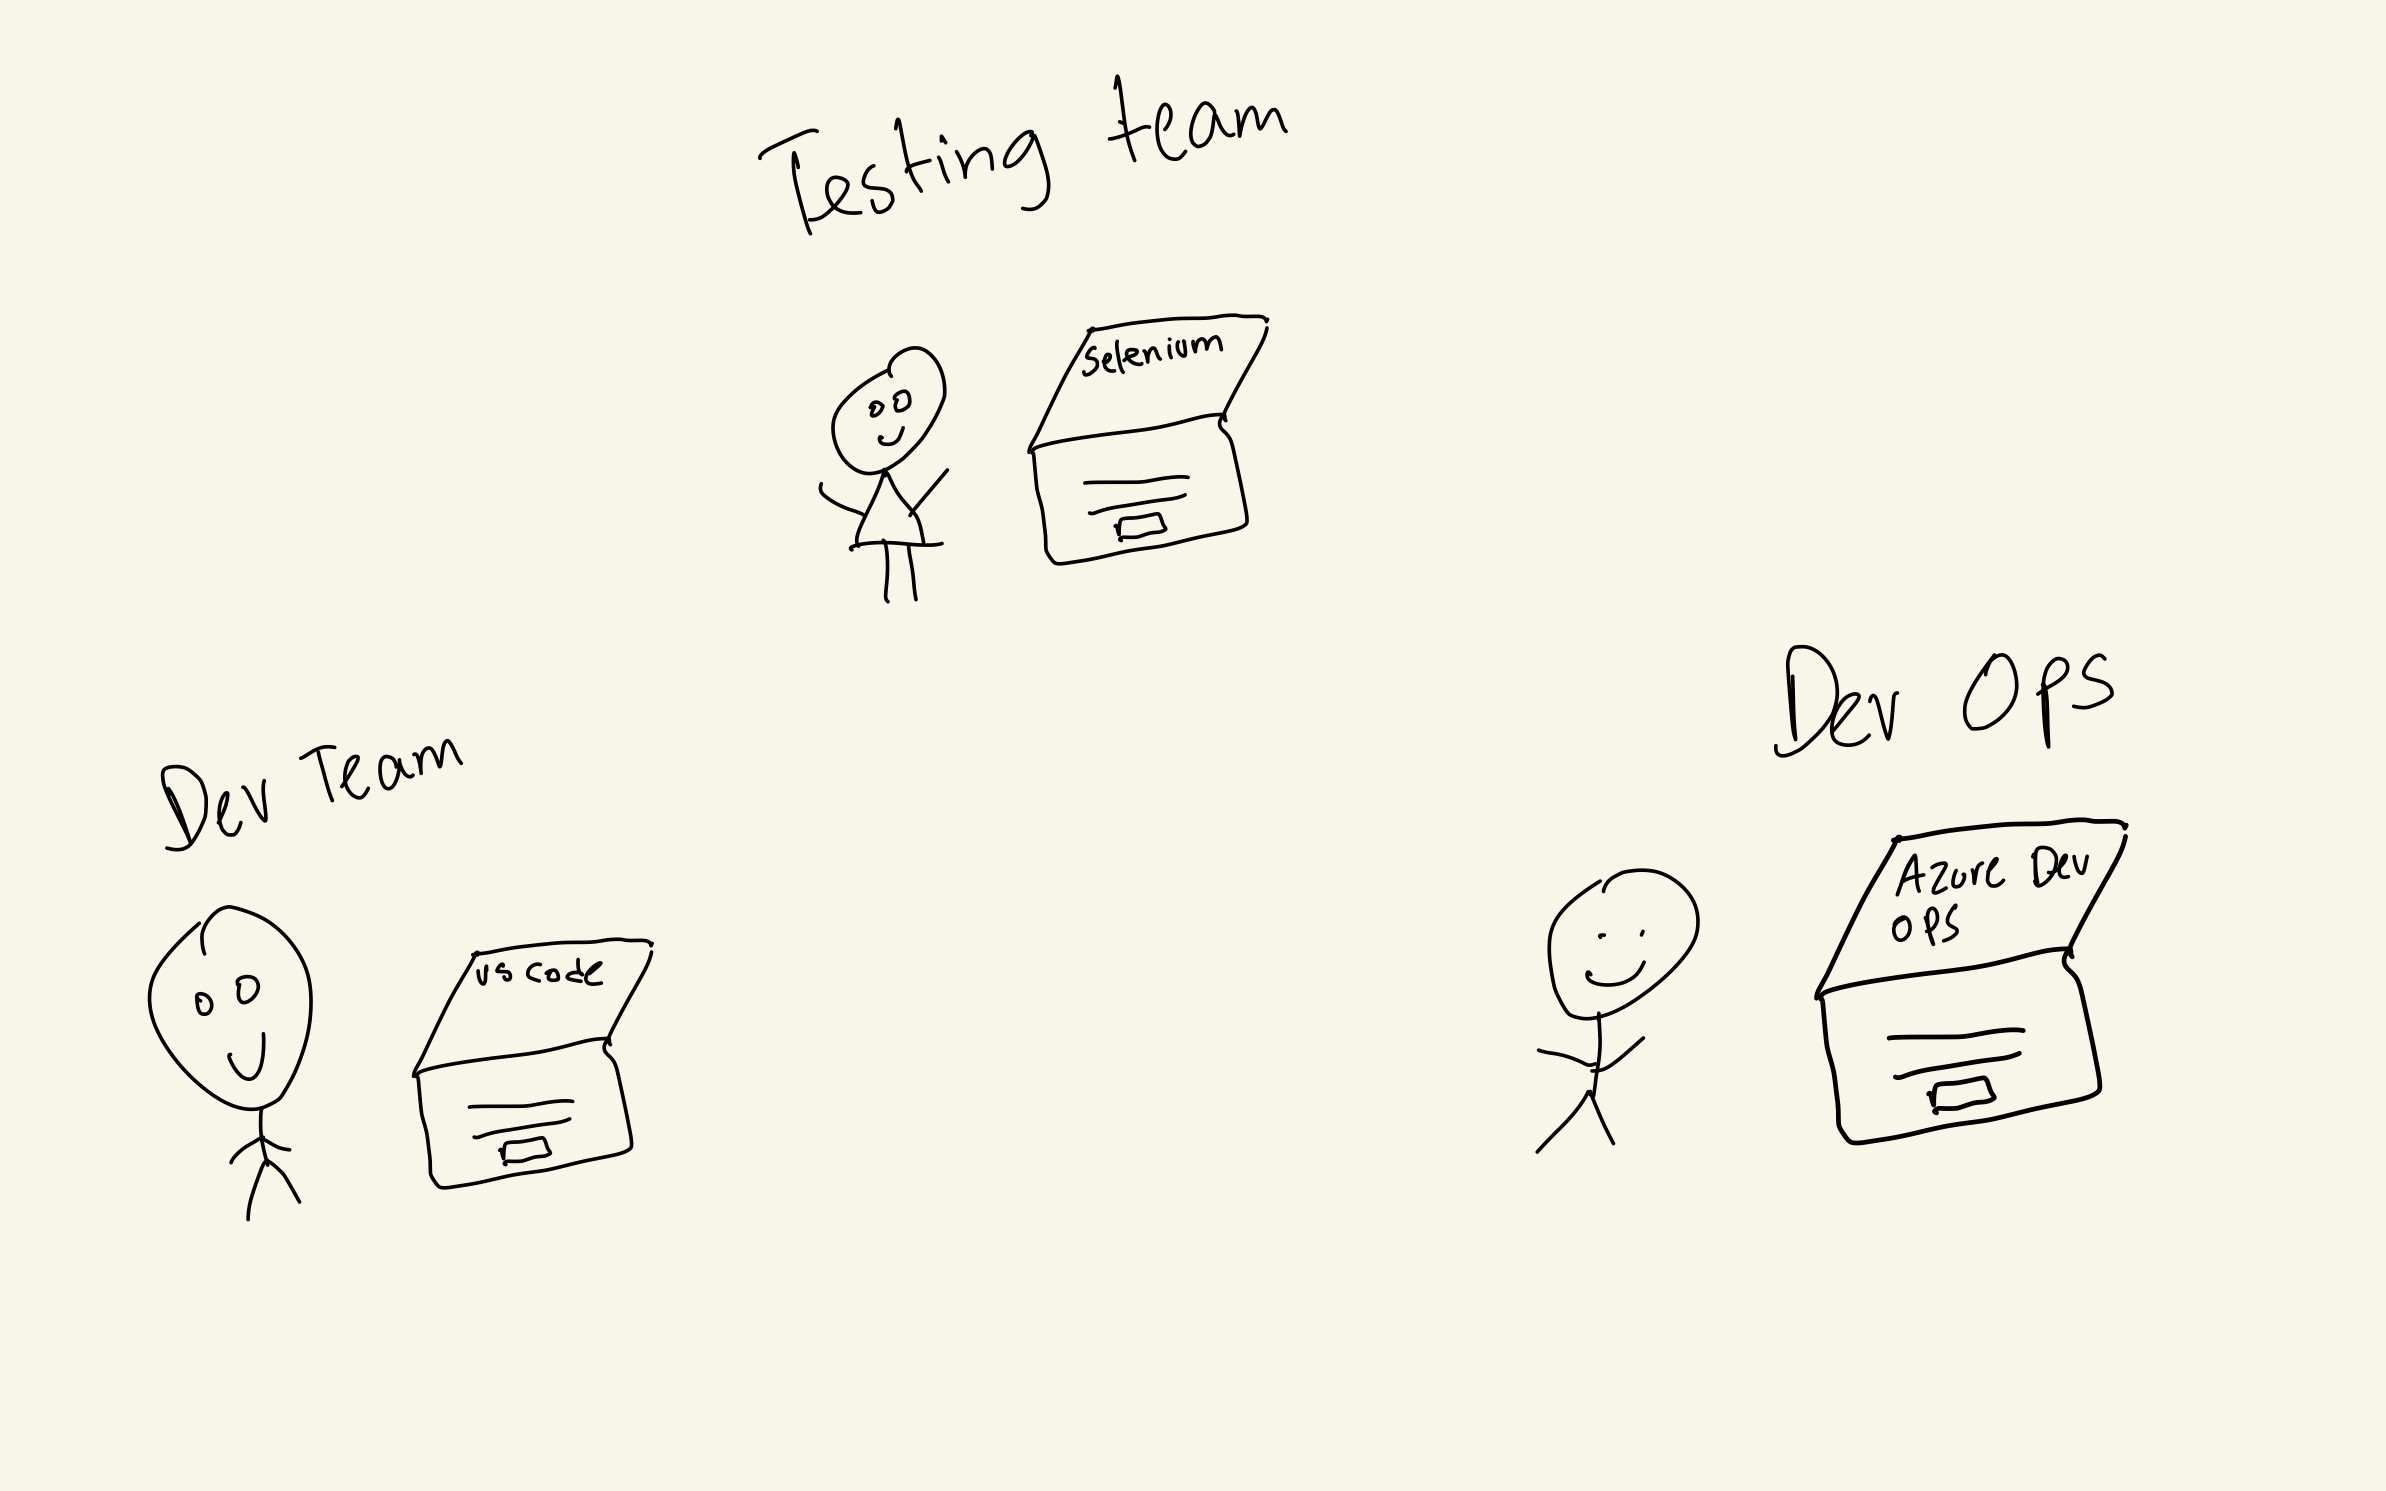
- Docker runs applications in an isolated environment.
- Apps are developed, ran and deployed on the same environment.
- Docker uses less memory.
- Docker images can be built to contain the bare minimum requirements that our app needs. Also known as Alpine images.
Docker Architecture
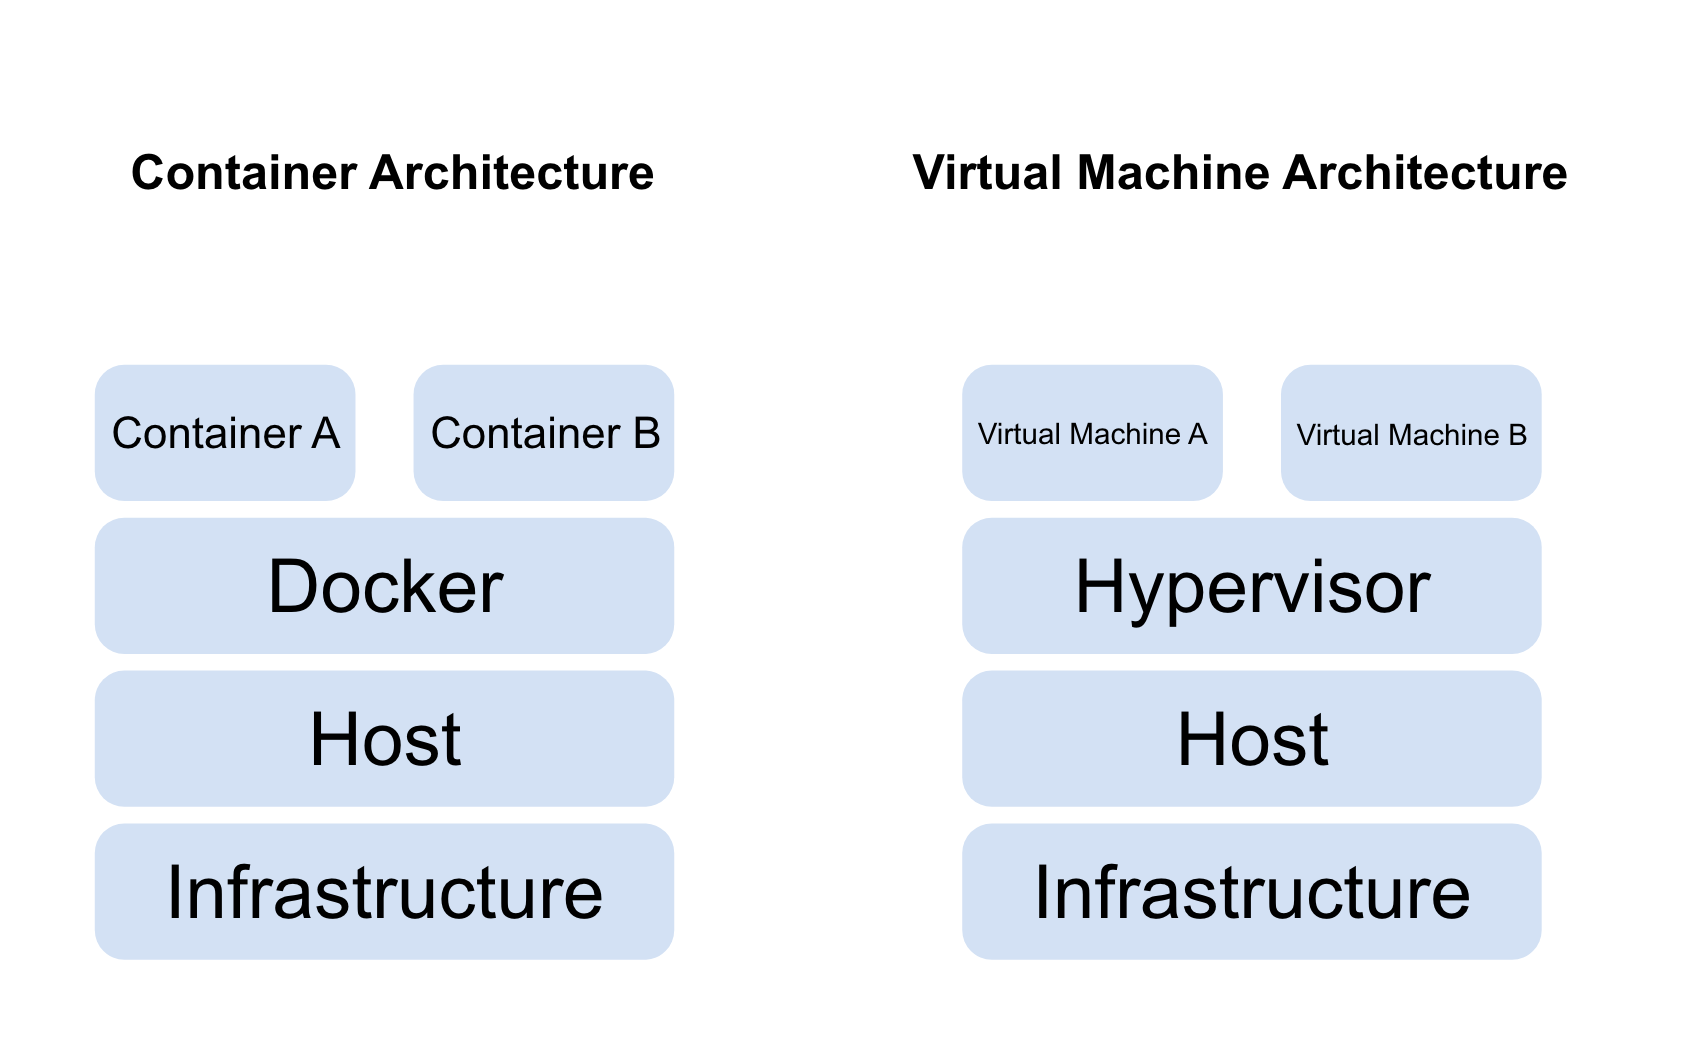
Now that we have a brief understanding of what docker is, we can start taking a look at the main components:
- Docker Registries: this is where we store our images, we have public and private registries. There is several images registries but the most popular one is docker hub we can also deploy our own on premise registry. Just like github is used to store our code, docker registries store docker images.
- Docker Images: An image is read only template that provide instructions on how to create a docker container. We can think of it as a class or a blue print. Usually we start our projects by creating an image on top of already created images. Docker Container: This is the runnable version of our image. We can think of it as our virtual machine.
- Docker Deamon: Listens for API requests and interacts with objects such as volumes, containers, image, etc.
- Docker Client: Also known as docker dashboard, this is how must users interact with docker.
Install Docker
Hands On Tutorial (CLI/Dashboard Tutorial)
Working with Images
So far we have learned about the architecture of docker and its main components let’s take a closer look at how things work. Before creating a container we need an image, in order to do so we need to run docker pull name-of-image docker will then go ahead and look for an image with the same name from docker-hub as it is our main repository. For the purpose of this tutorial we will be creating a new container for Wordpress (the most popular blogging platform) docker pull wordpress will pull the image and store it locally so we can create a new container from it.
Now that we have an image we can also list all the available images that we have by simply running docker images -a. We can also delete an image by doing docker image rm image-name. If you face any issues or you are stuck somewhere you can use the --help in front of any command and you will get some help, we can try that with the container command as we are going to be creating our first container from the CLI.
Working With containers
We are now ready to create our first container, how awesome is that 😎😎😎 !!! In our case we are creating a wordpress container referring to their documentation we can create the new container by simply running docker run --name some-wordpress -p 8686:80 -d wordpress. Let’s analyze together the meaning of each part of this command:
docker run: We are calling the container process that will be responsible of creating a new container for us.--name: This argument will give a name to our container. If we do not include it docker will generate a random name for us. It is always best practice to give a container a name especially when you work with different names and version of a containers things can get tricky.-p: This argument maps one or multiple network port(s) to our container. If we look at the picture bellow we can see how the exposure of ports work. In docker whenever we are exposing a port, drive, etc between the host and the container the right side of the colin is the container resource and the left side of the colon it is the host resource. In our case we are exposing port 80 of our container to port 8686 of our host.
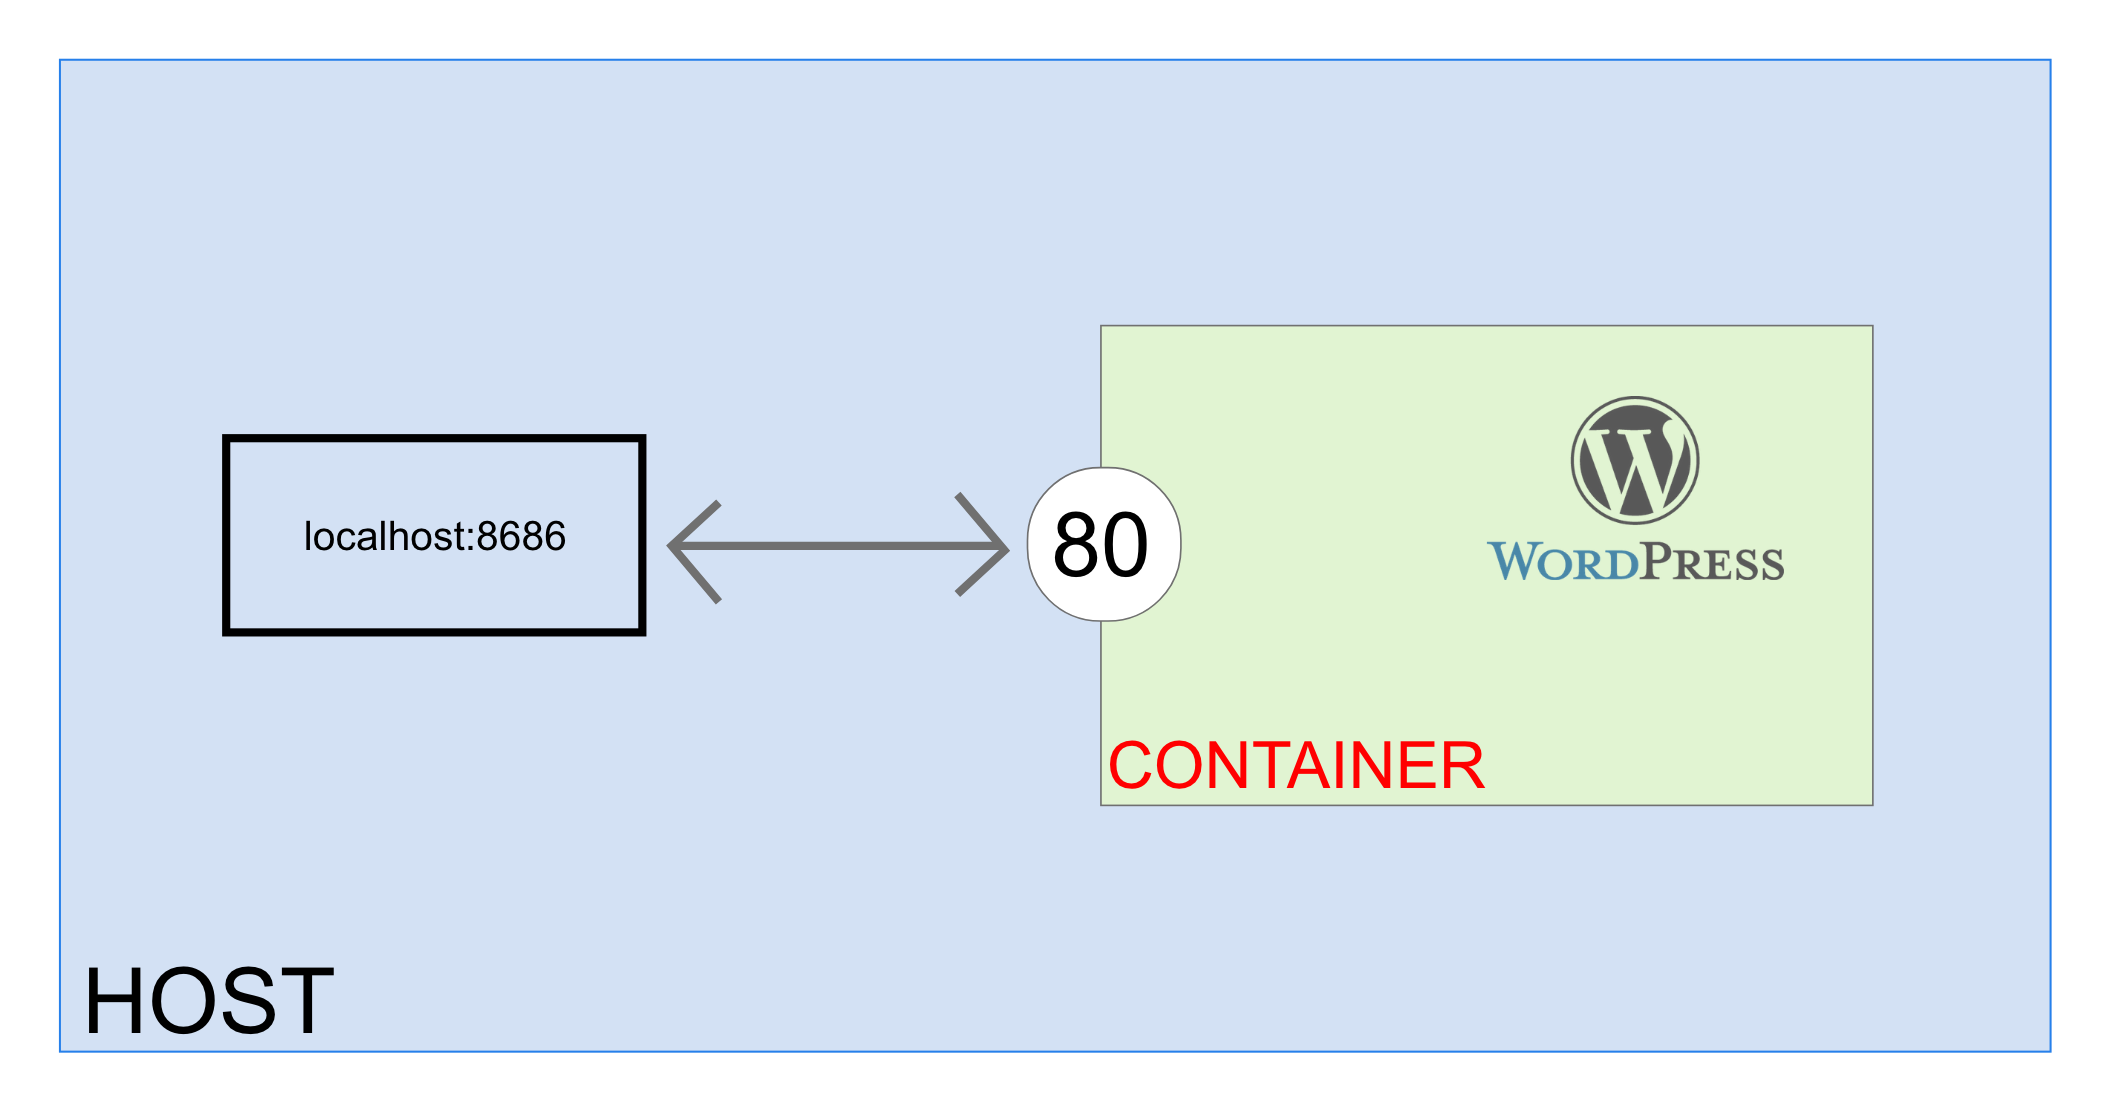
-d: This flag is used to instruct docker that we would like to run the container in detached mode AKA in the background as we won’t be giving any inputs our outputs to the docker CLIwordpress: Finally we can give the name of the image that we would like to use.
☸️ What is Kubernetes? ☸️

Why use Kubernetes?
Kubernetes Architecture
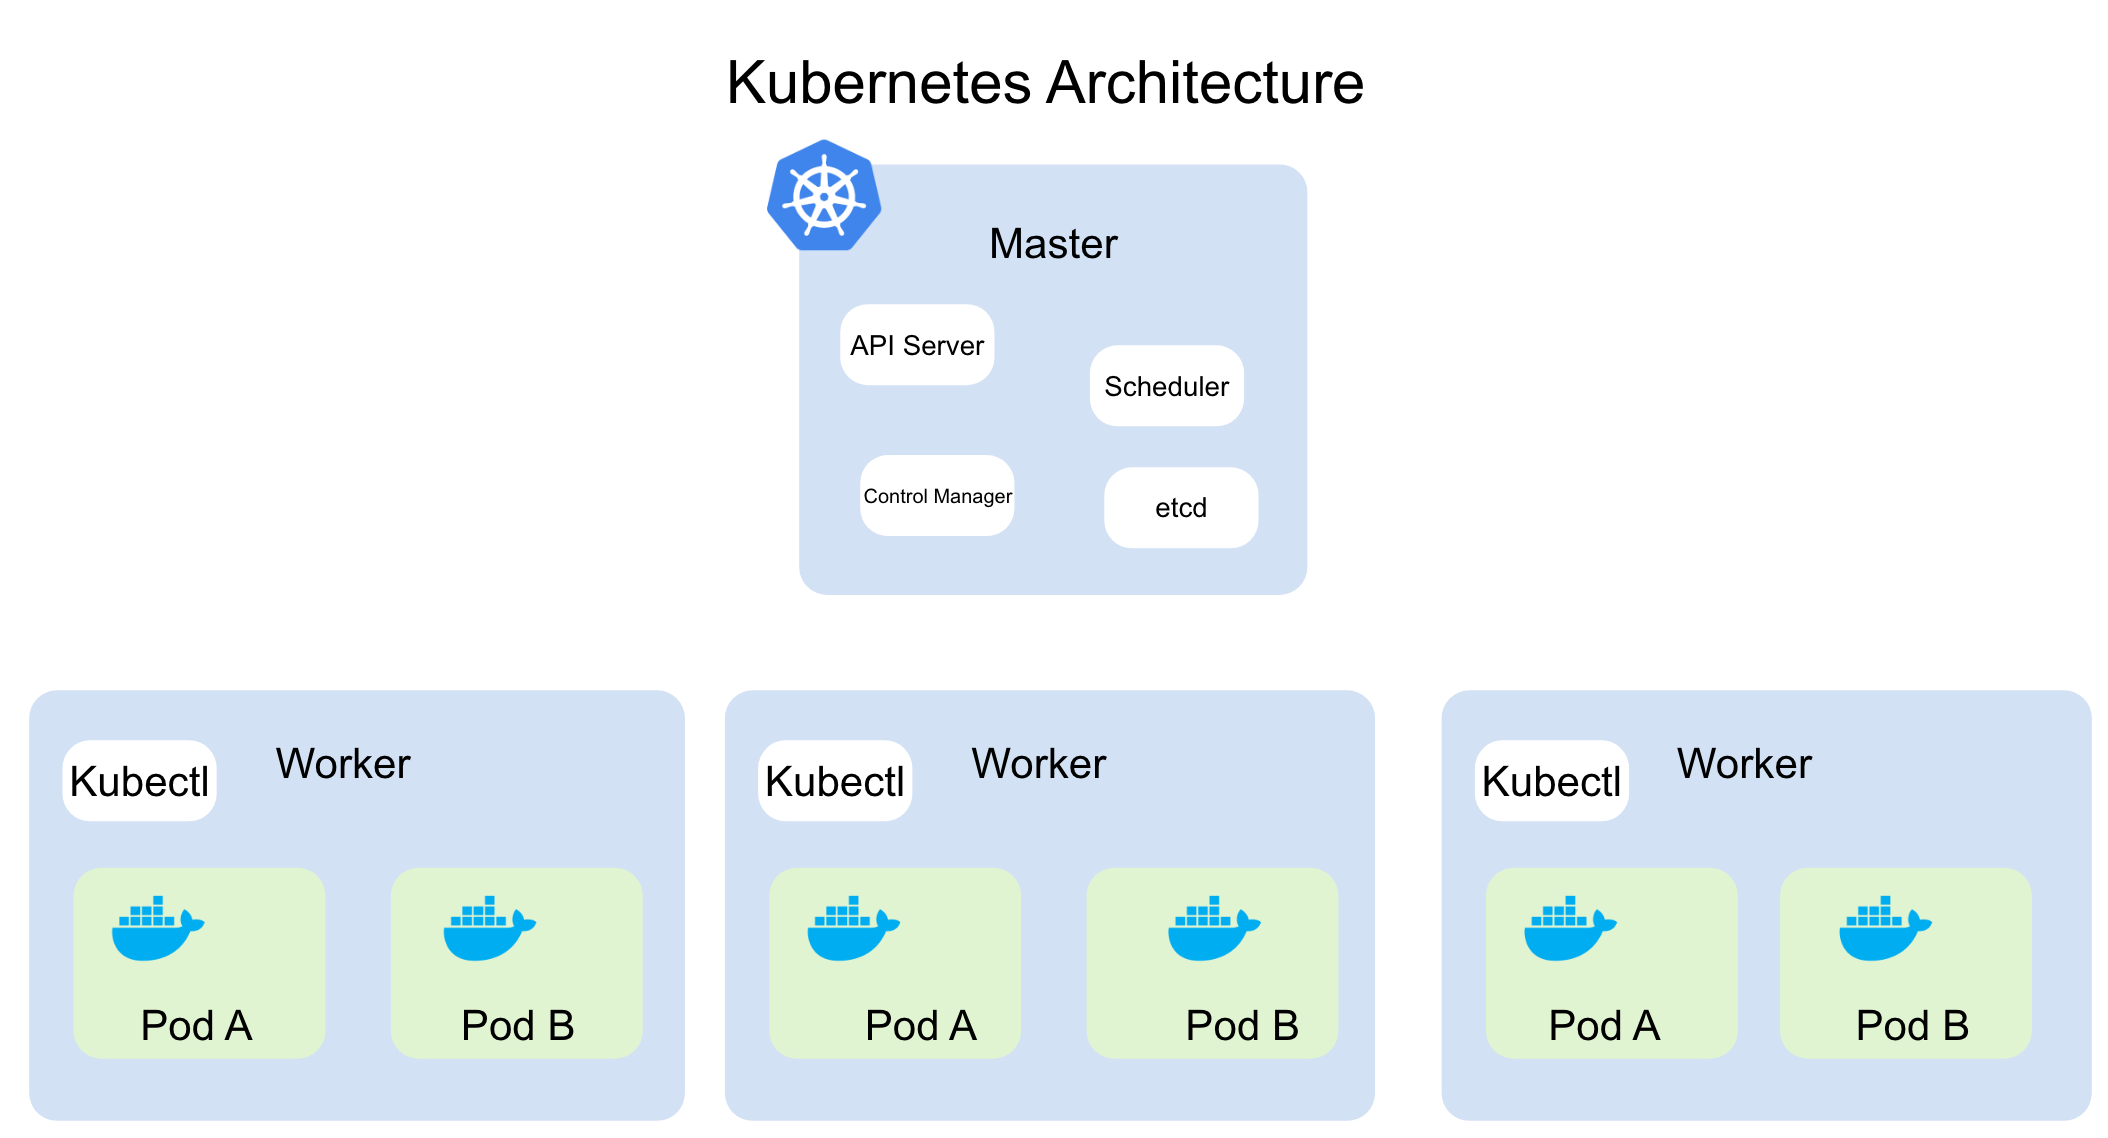
Let’s take a look at few major components.
- API Server: Similar to docker api this service is responsible of receiving requests related to pods,nodes, services, ingress,etc. It is the heart of kubernetes.
- Scheduler: This process is responsible of assigning pods to the worker nodes.
- Node: These are our workers machines, they can either be virtual or physical machines.
- Pod: This is a single instance of our running instance, for example it can be a docker container. Pods are not only supposed to be docker containers but can be any type of container.
- Networking
- Service: We can look at it as our network layer, a service has a permanent IP address. When we assign an IP address to a pod we don’t want the service to die if the pod terminates that is why pods and services are not connected. Services also behave as load balancers, they route the requests to the available pods and workers.
- External Services: This type of service is used if we would like to expose our application to external inbound connections.
- Internal Services: We use this type of service if we would like to only allow internal connections like between our application and the database.
- Ingress: If we would like to allow HTTP connections to our application ingress will receive the request and forward it to our service.
- Service: We can look at it as our network layer, a service has a permanent IP address. When we assign an IP address to a pod we don’t want the service to die if the pod terminates that is why pods and services are not connected. Services also behave as load balancers, they route the requests to the available pods and workers.
- Configmap: External configuration of our containerized applications.
- Secret: This component stores our secret configurations such as databases passwords and usernames, everything is base64 encoded.
Kubernetes Locally
What’s Next?
References
Word Count ≈ 2,172